Fabric calendars have been around for as long as I can remember, often as dish towels that you would receive as a gift at the end of the year from traditional household goods stores. When used as a dish towel, it at least had a use beyond its expiration date. But as a wall hanging, the calendar was just as obsolete as any other and usually ended up in the trash.
And I thought that was a shame somehow.
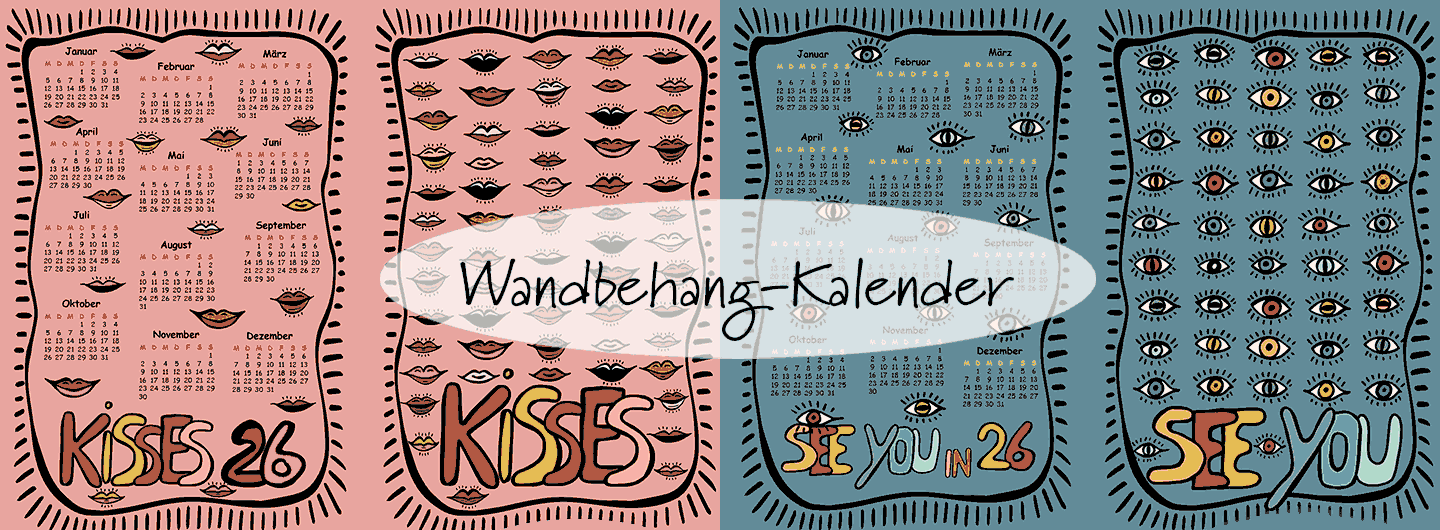
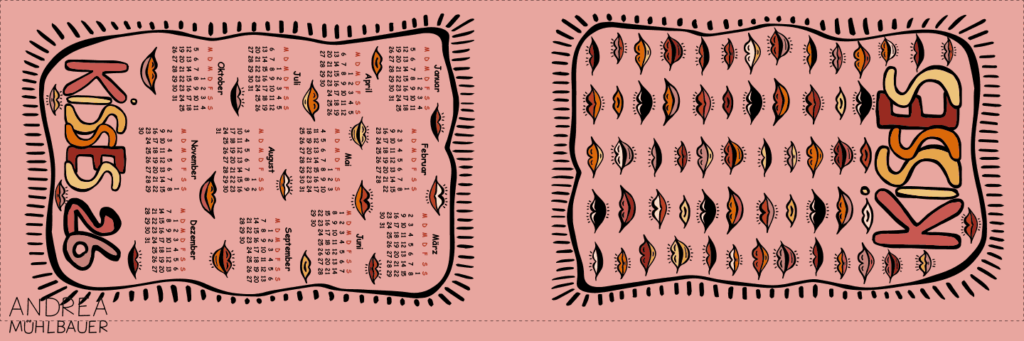
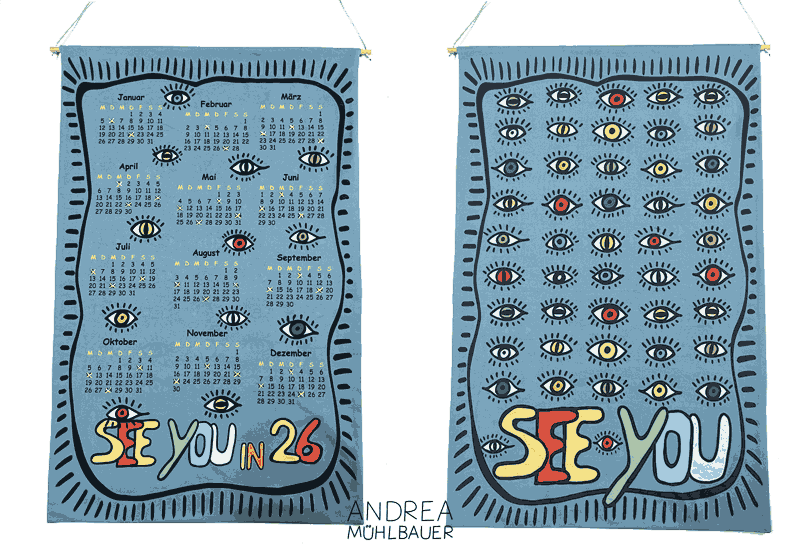
That’s why I made a “double feature” as a cut and sew project — on one side a calendar, on the other a decorative motif that no longer has an expiration date, unless you no longer like it![]() . But even then, you can still quickly sew it into a sustainable shopping bag, because these calendar wall hanging panels are available on cotton fabric and canvas.
. But even then, you can still quickly sew it into a sustainable shopping bag, because these calendar wall hanging panels are available on cotton fabric and canvas.
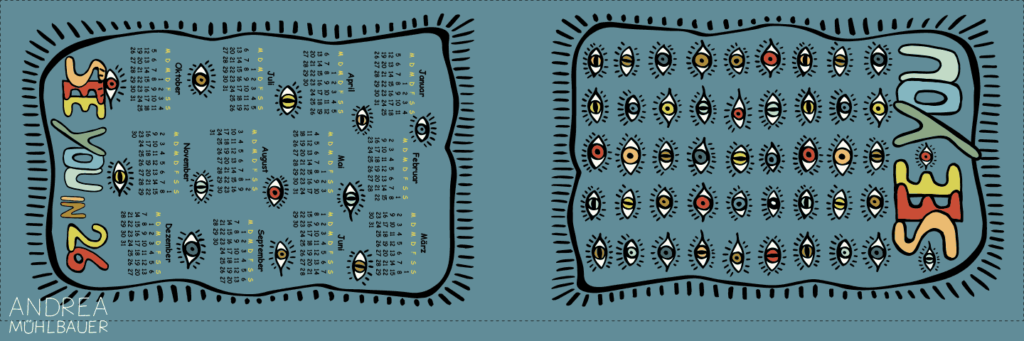
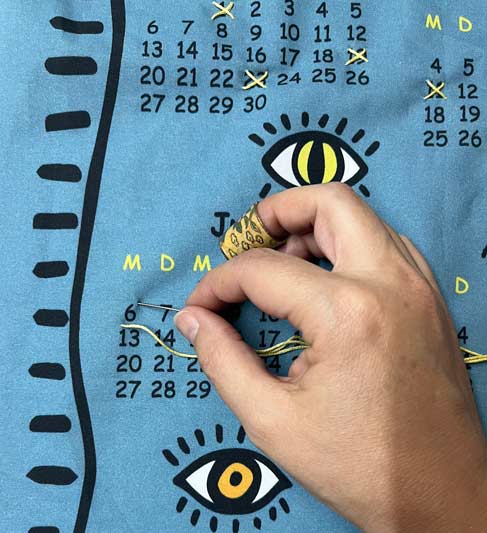
And the best thing about this calendar-wallhanging is that you can also mark important days—such as birthdays or planned meetings—to give it to good friends or family as a gift.![]()
The Kisses calendar wall hanging is also suitable as a reminder of the first meeting for new couples. Mark the day with a large pearl or with a button in the shape of a mouth for the first kiss. ![]()
The Love Calendar wall hanging is also suitable as a wedding souvenir. Simply mark the date with a heart and no one will ever forget the wedding anniversary. ![]() .
.

More motifs at the end of this blogpost.
Needed Materials:
- A calendar wall hanging Cut and Sew Panel -> all Calenderdesigns
- Sewing thread
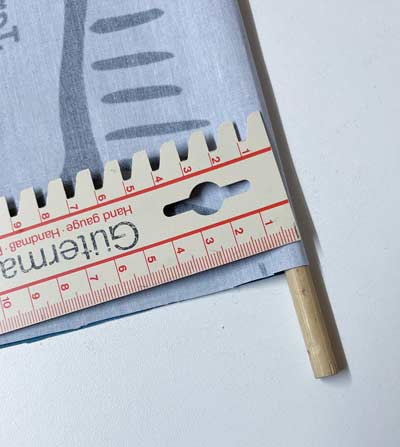
- A round wooden rod approx. 0.7 cm in diameter and approx. 50 cm long
- A cord in the desired length to hang the calendar
- If you want to mark important days: embroidery thread, beads, studs, or fabric paint
How to sew the calender wall hanging?
Cut out the panel along the dotted line.
If you want to mark special days, you should do so before sewing the fabric together, as this makes it easier to embroider the fabric or, in the case of fabric paint, prevents it from bleeding through to the other side—allow the paint to dry thoroughly before continuing to sew!

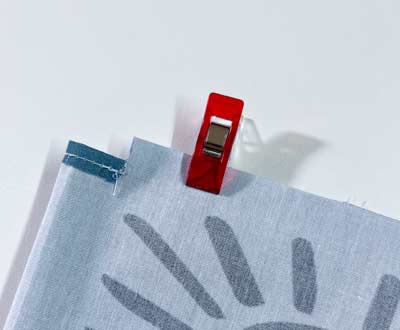
Fold the panel in half, right sides together.
Measure 1.5 cm from the fold, cut approx. 0.7 cm from the edge, and iron the cut seam allowance for the rod pocket. Stitch the seam allowance close to the edge.

Sew the two pieces together with a 0.7 cm seam allowance, leaving a 15 cm to 20 cm opening at the bottom edge for turning.
Trim the seam allowances at the corners and turn the wall hanging inside out.
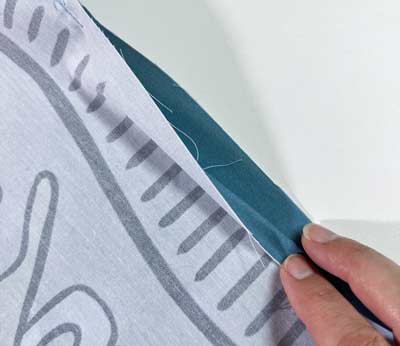

Close the turning opening either by hand or by topstitching the entire wall hanging close to the edge—but leave the rod tunnel open!
And just like that, you have a quick and original Christmas gift!
Have fun sewing and gifting!
This post contains advertising!
The following calendar wall hangings are planned:


0 comments on “Calender Wallhanging – Cut and Sew Project”