I’ve always been a fan of upcycling. My mom told me that her seamstress would turn winter wool coats or jackets inside out when the outer “right side” of the fabric was worn out but the inner “wrong side” was still in good condition. Parachute silk would also be dyed to make dresses and blouses. I found this fascinating. I sometimes used fabrics intended for other purposes to sew my own clothes. So I turned gold-printed curtain fabric into elegant pants and used metal curtain rings as buttons on a coat.
I unfortunately strayed from sewing and embroidery for a while, but recently, I’ve become particularly interested in upcycling jeans in combination with test prints of my designs at Lillestoff and Spoonflower. For this project, I embroidered a small area of a test print by hand.
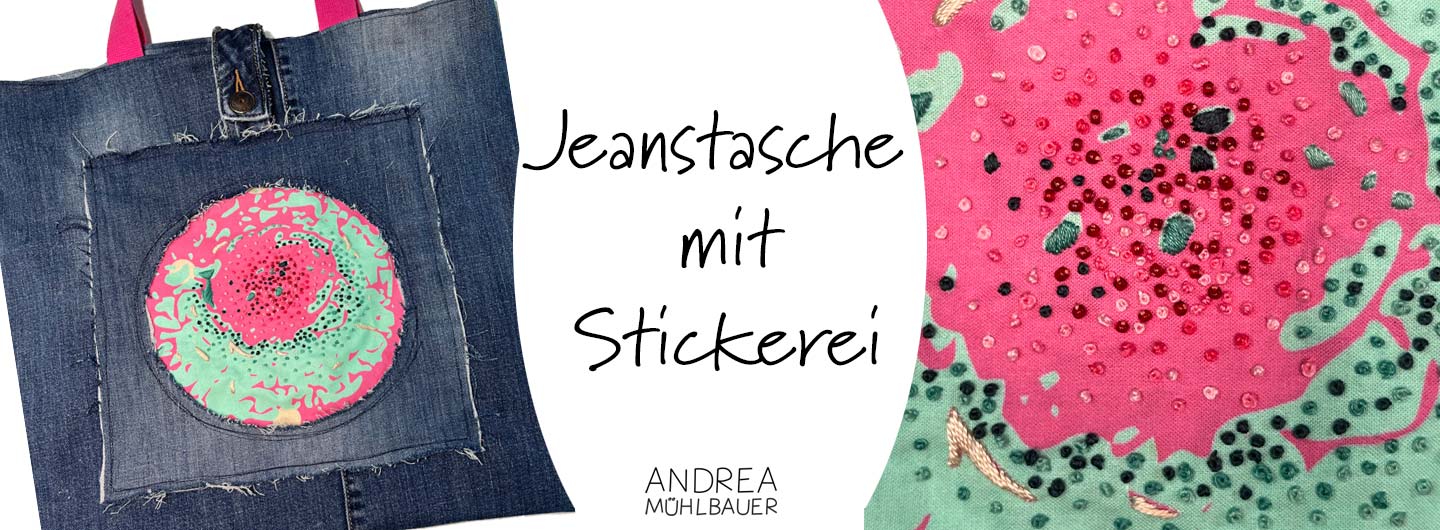
Jeansbag with embroidery und lining
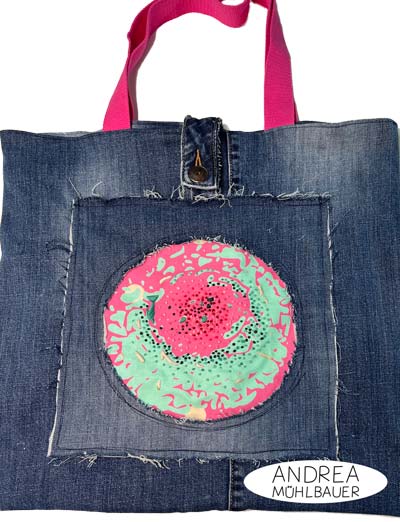
I sewed and embroidered this jeans upcycling bag for a dear friend’s birthday and used a larger test print of an original abstract ranunculus design for the embroidery. The bag is perfect for my friend because she loves pink and flowers. However, when I started embroidering, I discovered a shape on one side of the flower that looked like a dolphin. Thus, the ranunculus became a coral reef with a dolphin, and the planned front pocket got a peephole like a submarine.
I realized that I enjoy the process most when I plan my projects just roughly and allow myself to be surprised by the outcome. I’m curious to see how the next one will turn out!
What materials did I use?
- An old pair of jeans to cut up. The size of the bag depends on the width of the cut-up jeans legs. In this case, the bag is approximately 43 cm x 43 cm (17 in x 17 in).
- A piece of denim for the front pocket – in this case, approximately 25 cm x 25 cm (9.8 in x 9.8 in).
- A fabric for embroidery – in this case, a test print of the ranunculus fabric with matching embroidery thread and glass beads.
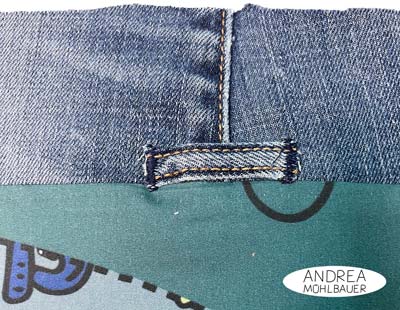
- The button from the jeans with a piece of waistband, in this case about 10 cm (4 in), and the buttonhole with waistband, in this case about 15 cm (6 in). It is best to cut both pieces generously in length and only shorten them once you know how long you need them to be.
- 2 x 50 cm (19.6 in) webbing for the bag handles.
- Fabric for lining. I used leftover pieces of my numbers fabric, which were left over from test sewing my school candy cone panel, and two approx. 10 cm (4 in) wide strips of denim for the upper edge.
- Two cut-off belt loops.
- A small tag or fabric label for the side seam.
How did I proceed?
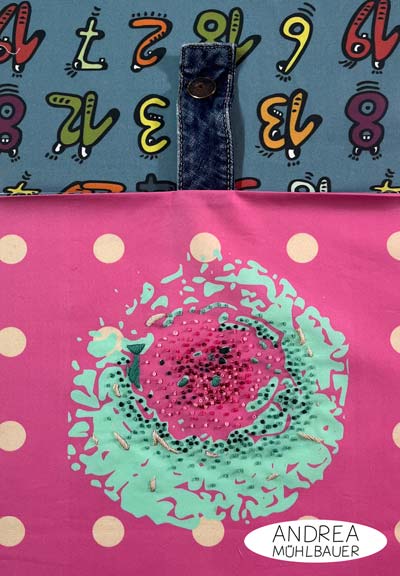
First, I embroidered freely around the flower, which I initially thought was a ranunculus, until I discovered the dolphin and transformed the motif into a reef. I used knot stitches and satin stitches, and in between I sewed glass beads in matching colors.
When the embroidery was finished, I cut a hole in the center of the denim piece, which was intended to be a patch pocket, and frayed all the edges with a needle.
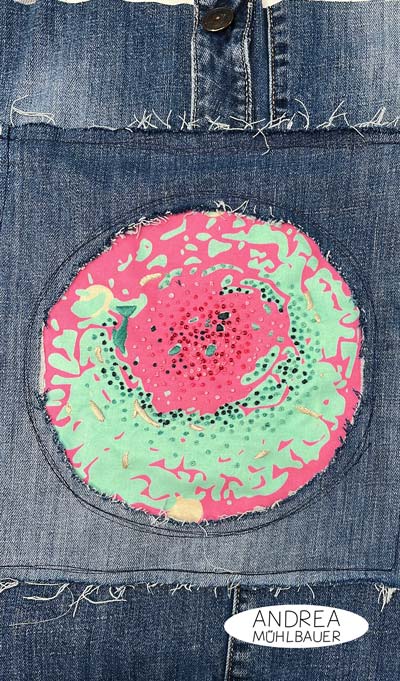
I sewed the embroidered fabric piece to the lining of the patch pocket at the top edge, putting the waistband with the button in between. I then sewed the denim piece with the peephole onto the embroidered fabric by roughly sewing around the peephole a few times with the sewing machine, without worrying about precision. I think the uneven seams go well with the frayed edges. Finally, I sewed the patch pocket onto the front of the bag, again with slightly uneven stitching.
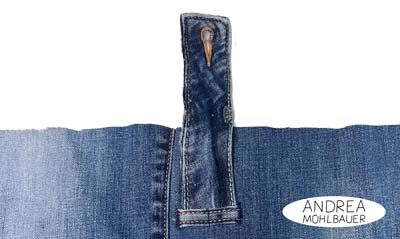
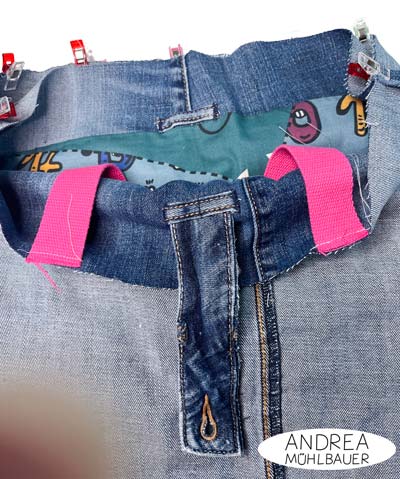
I sewed the waistband with the buttonhole onto the back of the bag so that it was long enough to fit for the button on the front of the bag, allowing the bag to be closed, and also covered the cut edge at the end of the waistband with a belt loop.
I sewed a strip of denim onto the top edge of the lining and added a belt loop over one of the seams, which could be used to hang a carabiner for keys.
Then I sewed the denim parts together—with a small homemade fabric label on the side—and the inner lining parts fabric together at the side edges and the bottom edge, leaving an approx. 15 cm (6 in) opening at the bottom edge of the lining to.
Then I sewed the outer fabric and lining fabric of the bag together right sides facing at the top edge, putting the two handles between at a distance of approx. 14 cm (5.5 in) from the outer edges.
I then turned the bag inside out, closed the opening on the bottom of the lining with the sewing machine, and topstitched the top edge narrowly.
Tip: For seams that have to bear weight, such as the side and bottom seams of the bag and the handles, it is advisable to sew the seam twice to ensure that nothing tears.
Let me know if this embroidered jeans pocket has inspired you to start your own project, and if you post it on Instagram, feel free to tag me at @andreamuehlbauer.
Have fun sewing, embroidering, or whatever else you like to do.
This blog post contains advertising.
0 comments on “Upcycling – Jeansbag with hand embroidery”