
I love drawing pattern repeats by hand, even though I compose the majority of my patterns from individual (often hand-drawn) motifs digitally, because of the variation options.
But the hand-drawn pattern repeats just still have a special appeal.
When I did my apprenticeship in embroidery over thirty years ago, computer-based work in this field was not really thought of. Even today, in the embroidery craft, the templates of the unique pieces are usually still drawn by hand and also the repeating decorations and patterns.
So how do you draw a pattern repeat by hand?
I think everyone has their own preferences. I like to draw completely interlocking patterns. Even if this approach is a bit risky and it happens to me now and then that the repetition becomes visible in some areas of the pattern. But the excitement of creating something that cannot exist a second time is simply worth it.

Most of my hand-drawn repeats are created on a square paper measuring 21cm x 21cm using a black ink pen with a soft tip. But neither the format nor the size of the paper really matter. It should just be a sheet with straight edges and right-angled corners, otherwise it will be difficult to put the drawing together.
It also doesn’t matter whether you draw in black ink or prefer to draw in color or use completely different techniques, it should only be possible to cut through your work and put it back together again.
So how should you proceed?
- Start in the middle with your motifs.
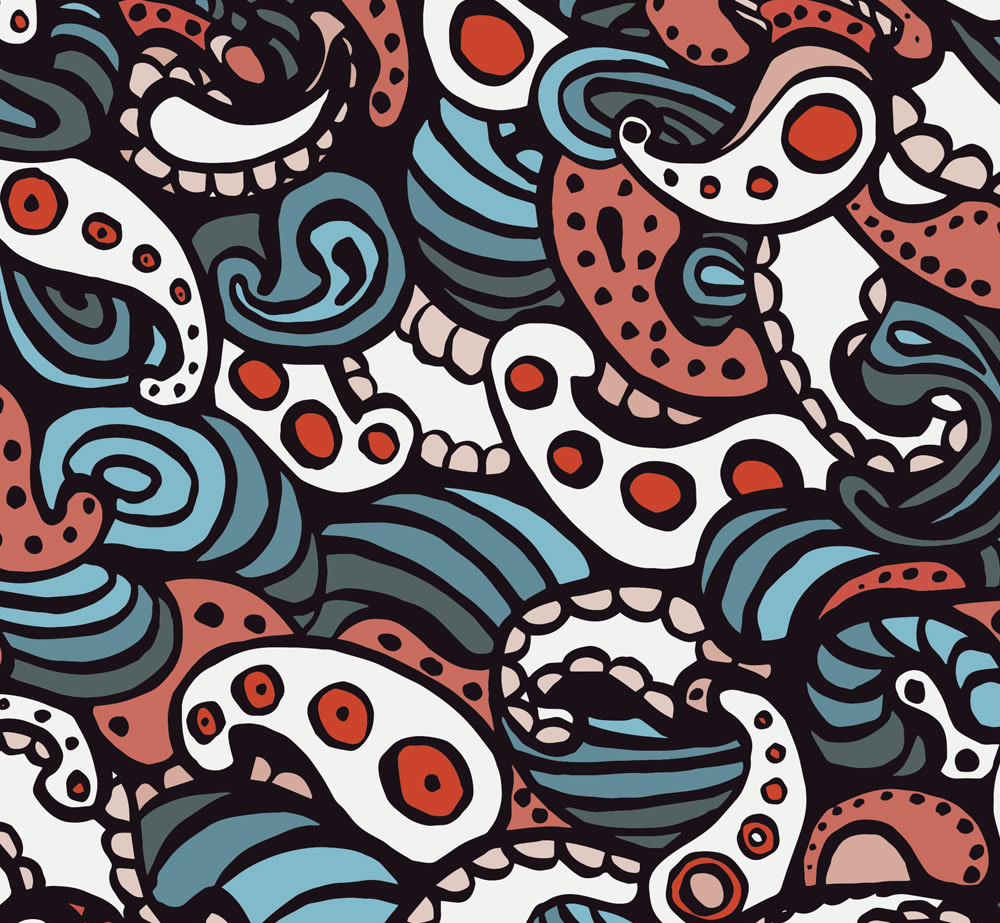
I usually draw without a plan. In this example I just had the idea to try out paisley-like shapes. - Make sure that the edges remain free by at least one design width.
I.e. if you draw very small, uniform motifs, you can use your first flow and fill the sheet much closer to the edges. If the motifs are very large and cluttered, leave more space around the edges.
Once you’re done with your drawing in the middle, it’s time to reassemble it so that the pattern can be used as a tile later.

- Cut your drawing into quarters and put the quarters together in the opposite direction. That means, the edges and corners of your drawing sheet now become the center.
- Fix your quarters with a (removable) adhesive tape from the back.
Tipp: Make sure that you assemble the quarters correctly, otherwise the connections of the finished motif will not fit together and your pattern repeat will be more creative than you intended. :-).

Now fill in the empty space in the middle of your sheet with your designs, and your hand-drawn pattern repeat is ready.
After finishing this pattern, I digitized and colored it, and it is now available on fabric and home decor items in my Spoonflower shop .
Do you want to try this technique?
Feel free to let me know.
Article contains advertising
0 comments on “How to draw hand drawn repeats”