
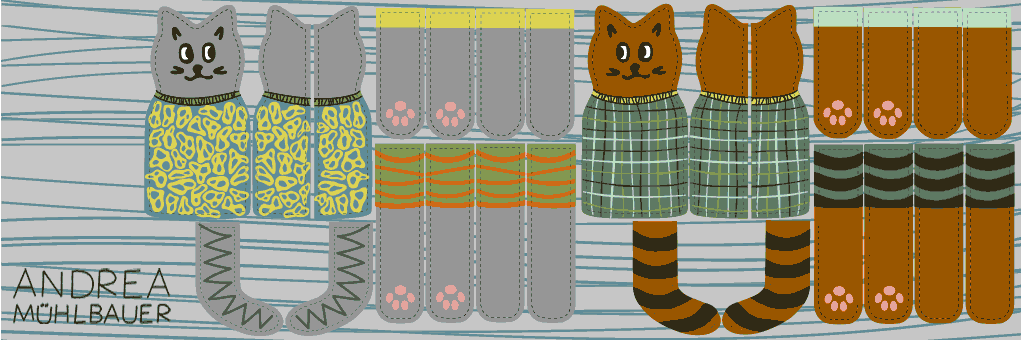
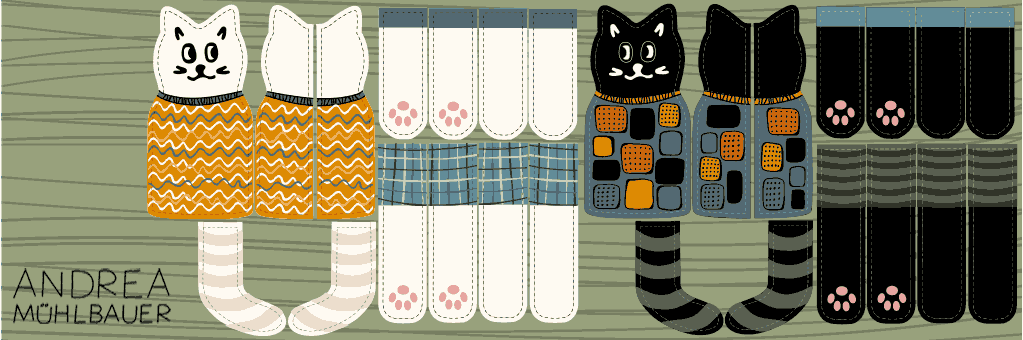
Sew your own funny rag dolls with pre-drawn patterns on Cut and Sew panels – just cut them out and sew them together. My cut and sew panels are available at Lillestoff.
(More panels at the end of this blogpost)

Required Materials:
- A cut and sew panel like the one above – I recommend jersey fabric
- Matching sewing thread
- Filling cotton
Sew a rag doll:
Cut out the pieces for the doll along the colored outer edge and sew the pieces for the arms, legs and tail together, right sides facing.

Cut in the seam allowance at the curves so that the seam lies better in the curve after reversing.

Turn the parts over and stuff them with filling cotton. Leave approx. 2 cm of space at the opening to sew the parts to the body and so that the doll’s arms and legs can still be moved afterwards.
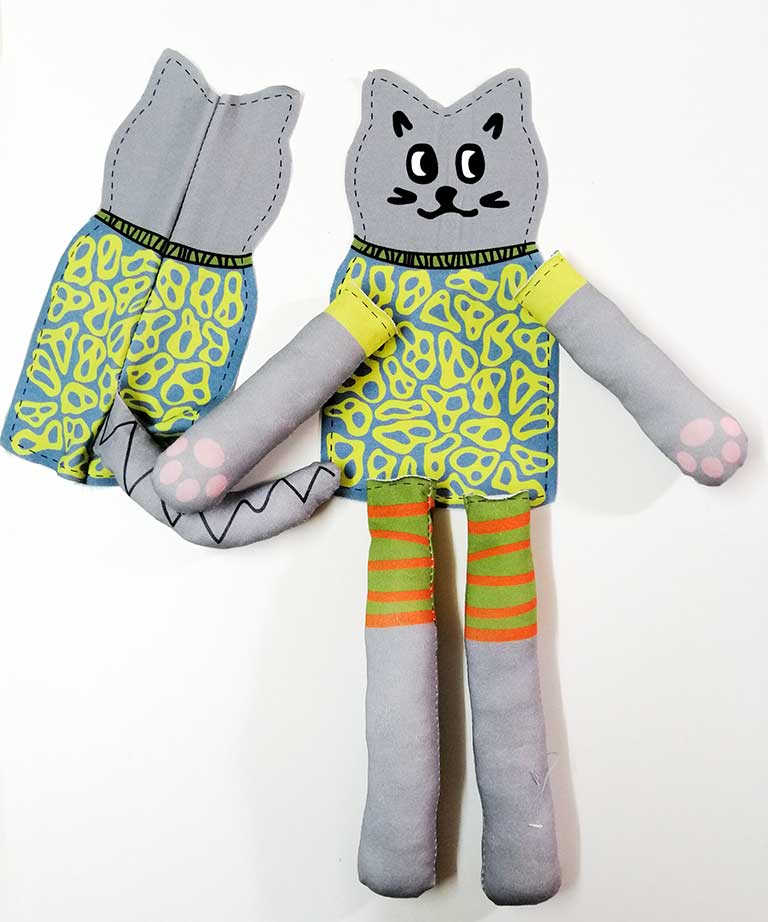
Pin the tail between the dividing seam of the back – the lower edge of the tail should be about 1.5 cm above the seam line for the upper body. Sew the back dividing seam and leave a turning opening of approx. 17 cm open.

Pin the arms and legs to the front of the top, right sides facing. To ensure that they do not move when sewing the upper body together, you can topstitch the arms and legs in place.

Fold the arms, legs and tail inwards and pin the upper body together, right sides facing. You can also pull the arms or legs slightly through the opening on the back to make sewing easier and sew along the seam lines.
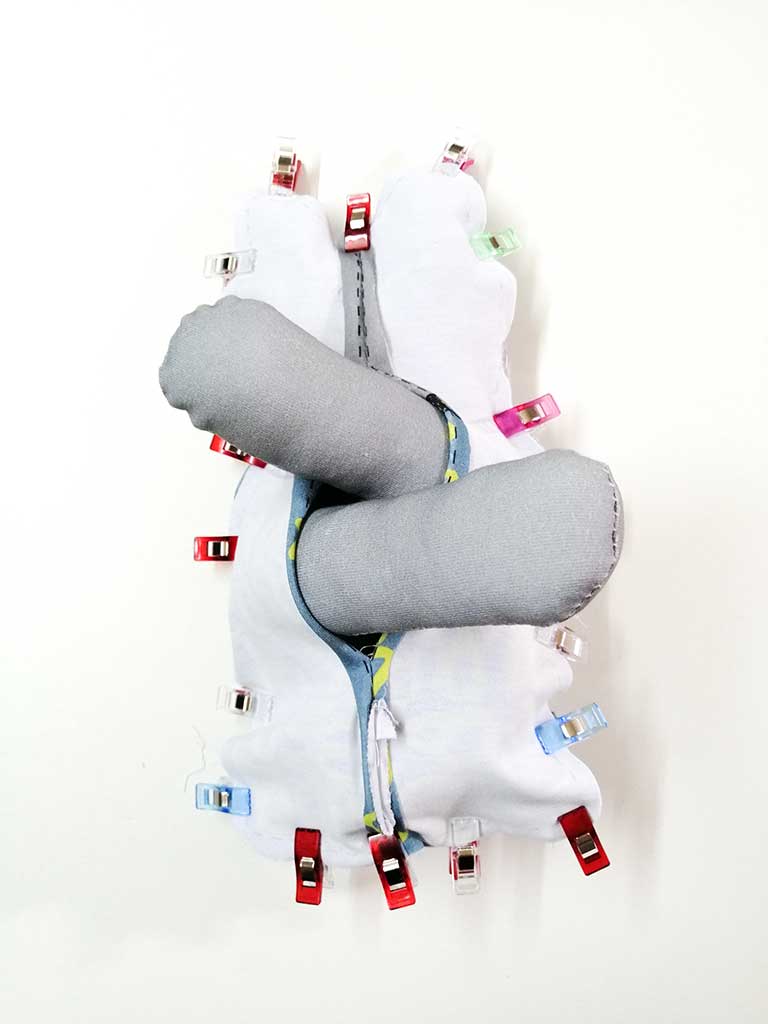
Turn the doll over and stuff the upper body with filling cotton. You can then close the opening on the back with hand stitches. And the rag doll is finished!

Have fun sewing!
(This blogpost contains advertising)
Tag me on Instagram @andreamuehlbauer if you sew my designs. I’d love to see it!
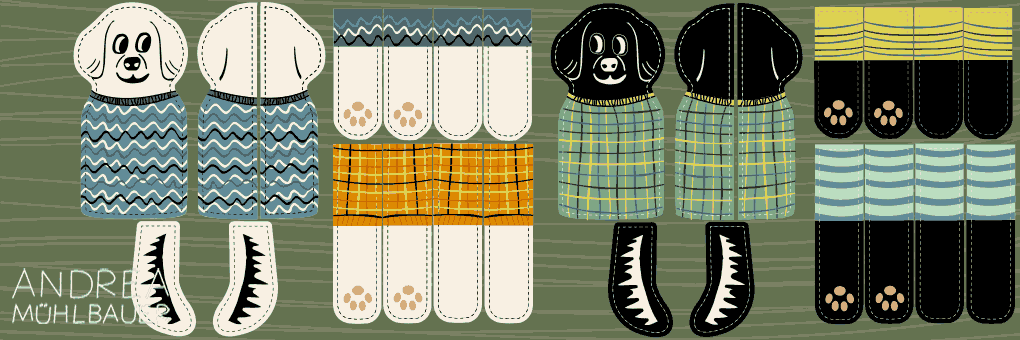
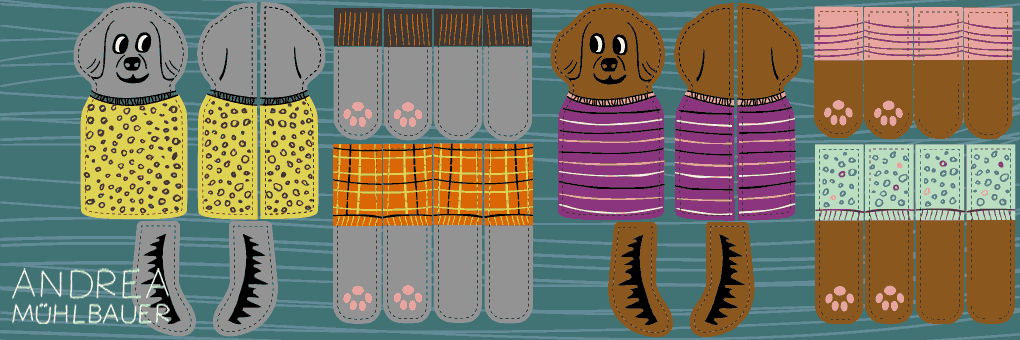
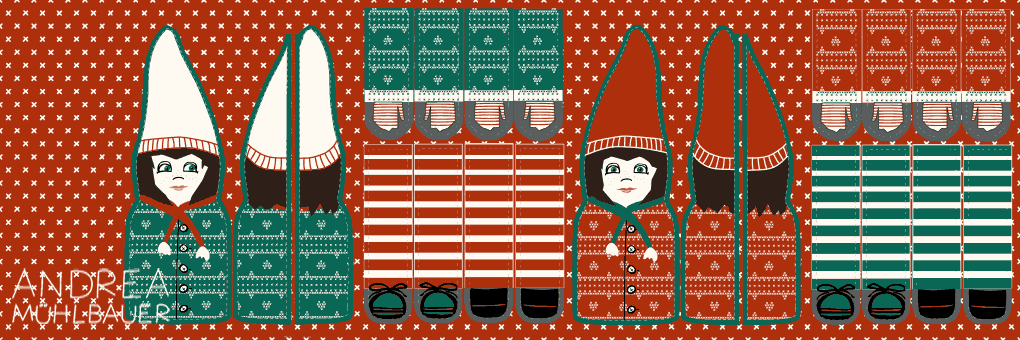
The following Cut and Sew doll panels are available at Lillestoff  .
.

0 comments on “Sewing tips for cut and sew rag dolls”